So about three years ago, we undertook a family project that involved us
giving up processed foods. For the most part we succeeded, and have even made
strides in some areas. We now make all of our own jams and jellies, as well as
freezing vegetables in bulk amounts at the peak of the season, such as carrots,
beans, and corn. We also make all of our own bread. And what could go better on
homemade bread than homemade butter? Not much!
In the pioneer times, those lucky enough to have a cow could routinely
make their own butter with aid of a stonewashed churn and dash. Though the
process was certainly laborious, the settlers must have considered thesmleves
fortunate to be able to have such “luxuries” as butter on their cornbread or
toast.
Even in these modern times, butter can be made relatively easily by
pouring cream into a jar and shaking it repeatedly over 45 minutes to an hour.
However, with modern times comes modern machinery, and with modern machinery
comes a surprisingly simple way to make butter.
Please note, that while I make our butter in a stand mixer, handheld beaters can be used as well. Also, for best results, the cream should be at room temperature; ideally, it should have been out of the refrigerator for 12 hours.
It takes:
1 quart heavy whipping cream
3 Tablespoons plain yogurt
 |
| 3 tablespoons yogurt + 1 quart buttermilk |
Place cream and yogurt into bowl.
Turn on mixer or beat on medium speed until cream begins to thicken and form “soft peaks”.
 |
| Here the cream has been whipped until soft peaks have begun to form |
Increase speed to high (or higher, if a stand mixer), and continue to beat cream until it resembles whipped cream. In fact, if the process was stopped now and 1/4 cup of sugar was added, the perfect pie topping would be found.
Note: The speed can be set to high to begin with, but more cream will end up outside of the bowl, rather than in.
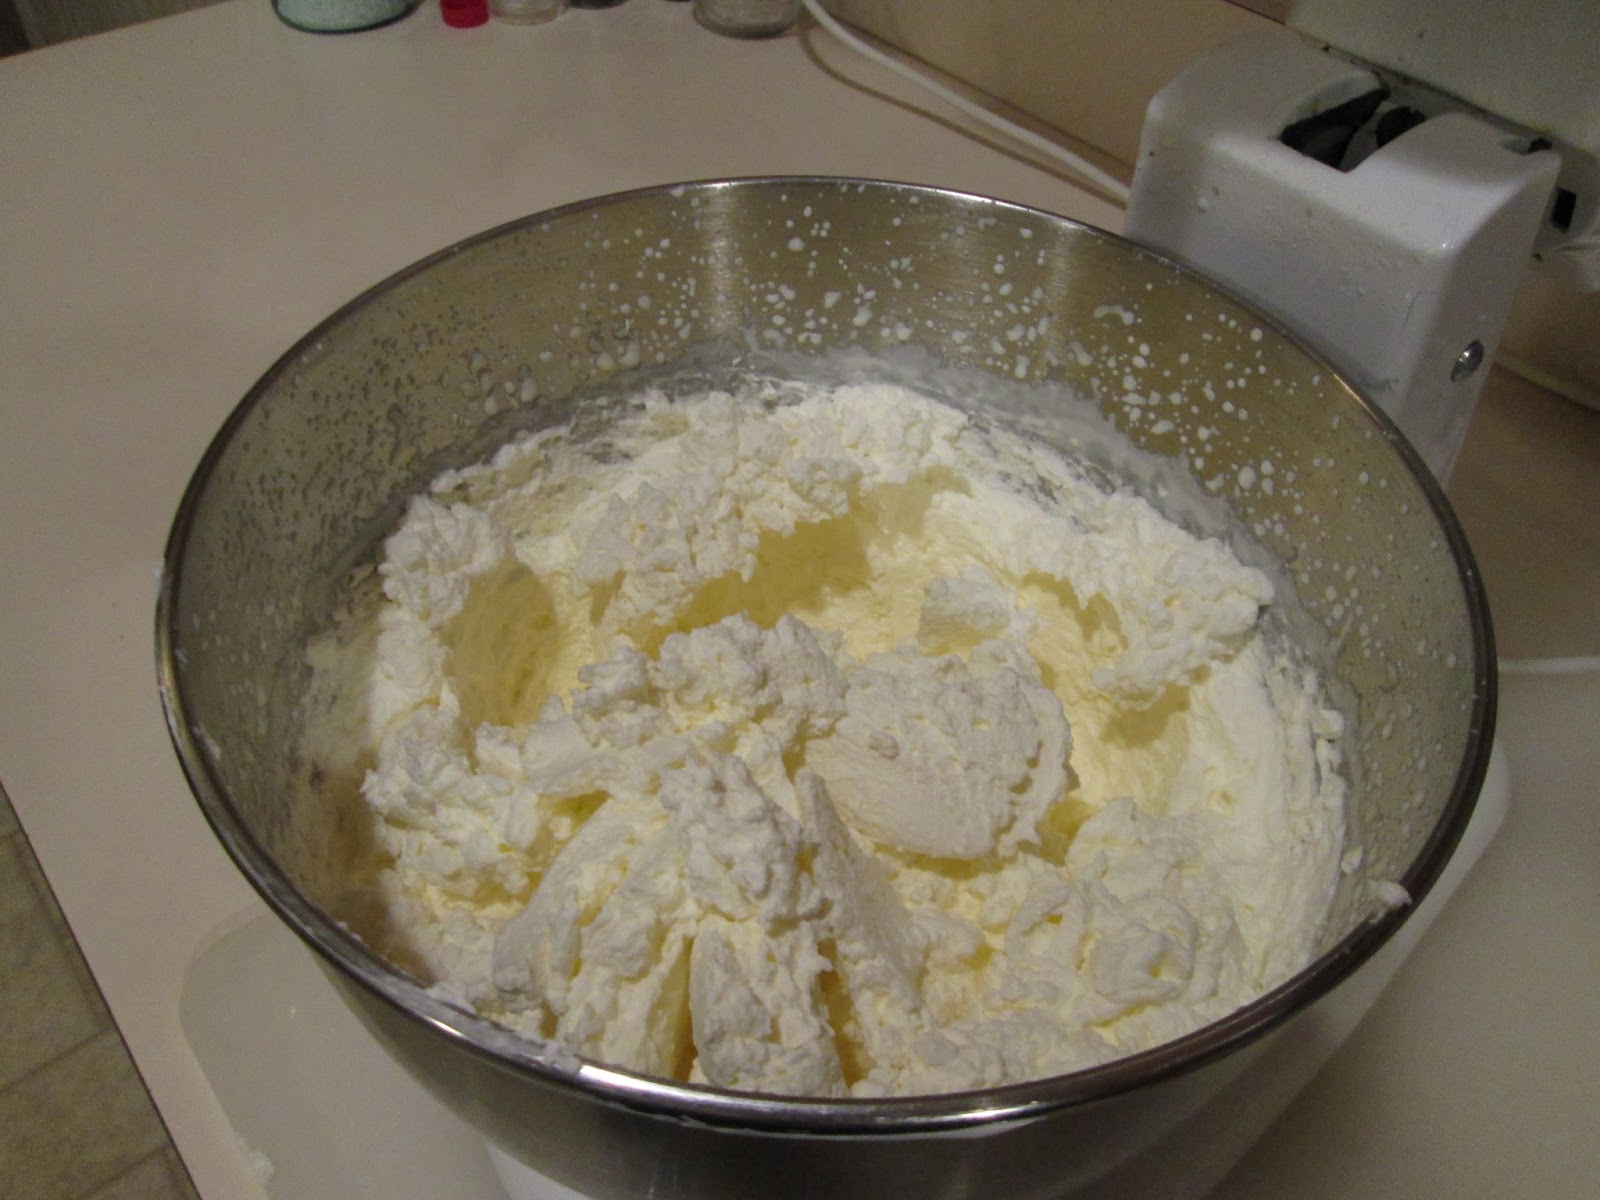 |
| Whipped cream |
 |
| Almost there...but not quite.... |
If using a stand mixer, raise the top and allow the butter to drip for a good 4-5 minutes.
 |
| Butter above buttermilk, dripping into the bowl |
Scoop out the butter into a bowl big enough to hold it, and use a slotted spoon to catch the smaller lumps. Pour off the buttermilk into a jar and use the slotted spoon again to catch the smallest particles of butter; it is much easier if you do it after pouring it into a jar than from the bowl you used to make the butter.
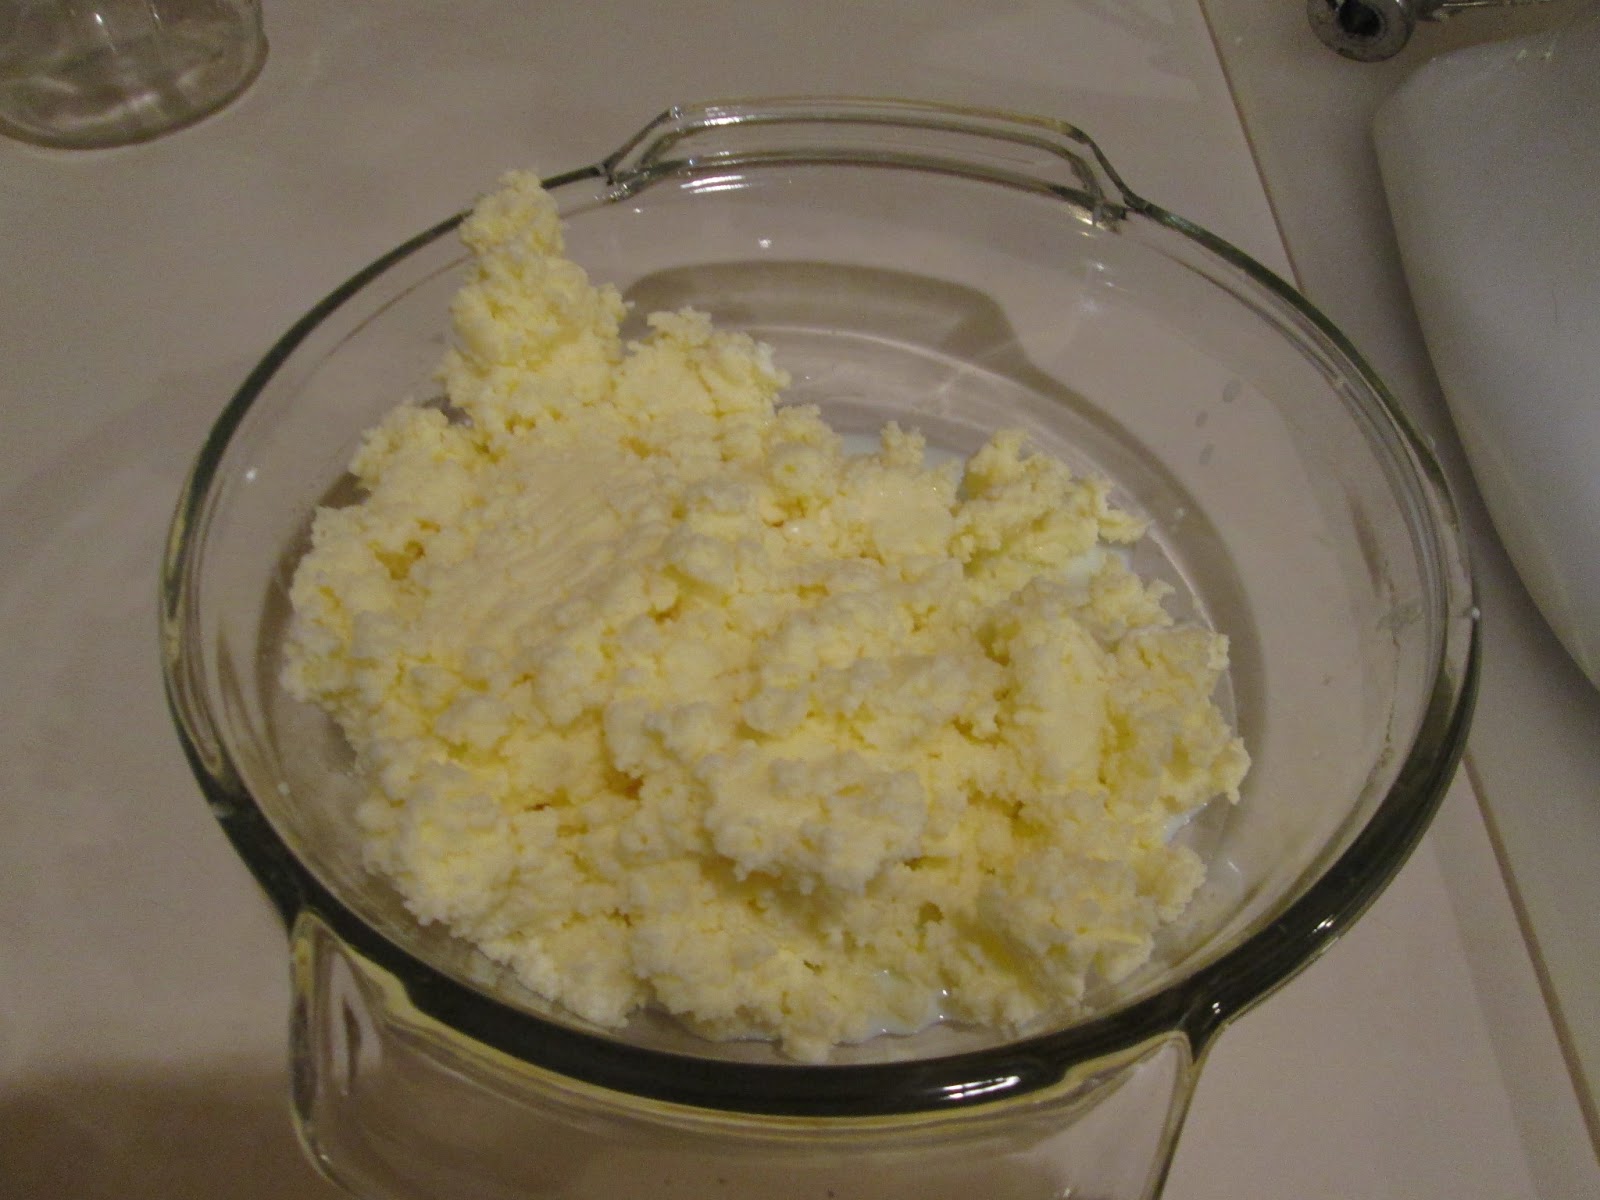 |
| Unwashed homemade butter |
 |
| Wooden spoon/paddle and wood cutting board |
Scoop out a portion of the butter with the wooden spoon onto the cutting board. Turn a faucet to very cold and about ½ power. Using the wooden spoon, push down hard onto the butter and run the water over the butter. Fold the butter in half using the wooden spoon and repeat with the water. Do this until the water runs clear, then scrape off the butter onto waxed paper.
 |
| Push down hard with wooden spoon, forcing buttermilk out of butter... |
 |
| ...and rise away with cold water. |
Repeat with remaining portions of butter.
Gather the waxed paper under the sections of washed butter and squeeze until the entire mass of butter forms a ball. Do this over the sink, as water and a thin amount of buttermilk will run out of the waxed paper. Transfer butter to a fresh sheet of waxed paper, wrap, and place in refrigerator to chill.
Voila! Butter and buttermilk – all homemade.
One quart cream + 3 Tablespoons yogurt = 1 pound butter + a little over 2 cups of buttermilk.
 |
| Homemade butter and buttermilk |
Note: Salt and other herbs can be added as desired. For salted butter, just
sprinkle a pinch of kosher salt over the butter as you scrape and fold. Don’t
be afraid to experiment – it may not turn out the way it was intended to, but
homemade butter is usually “exotic” enough to most that they will try it no
matter what.


